|
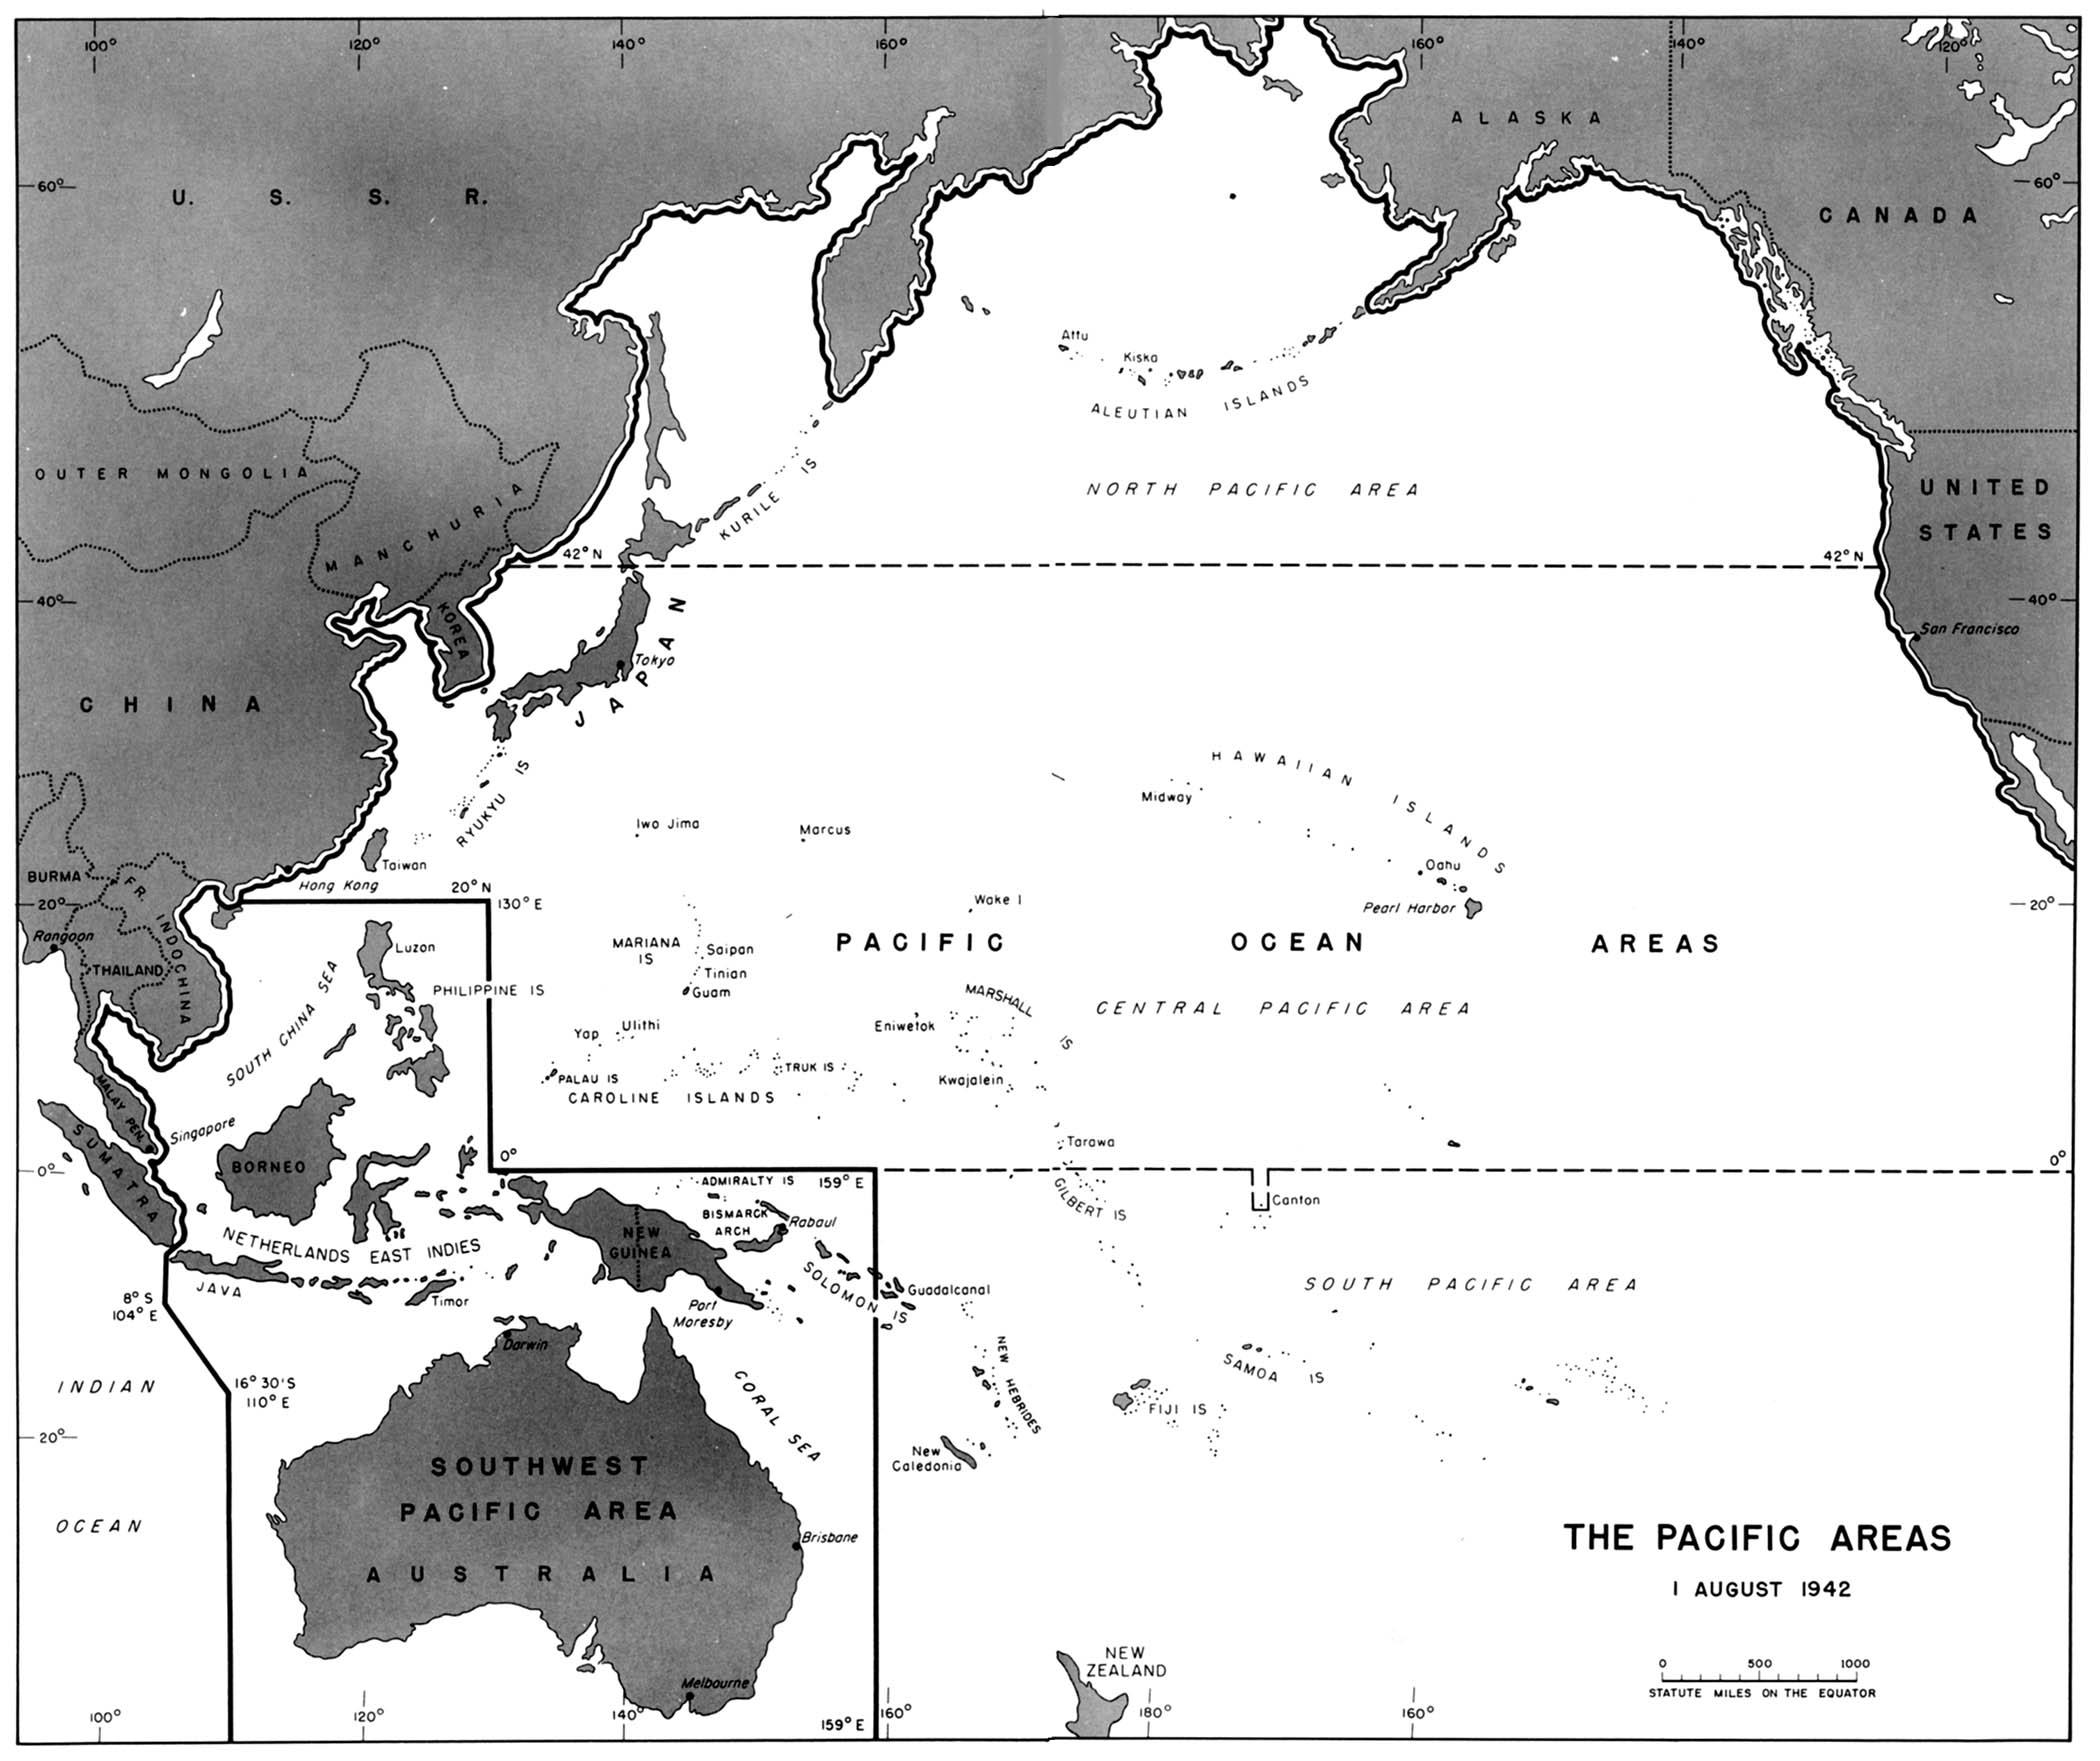
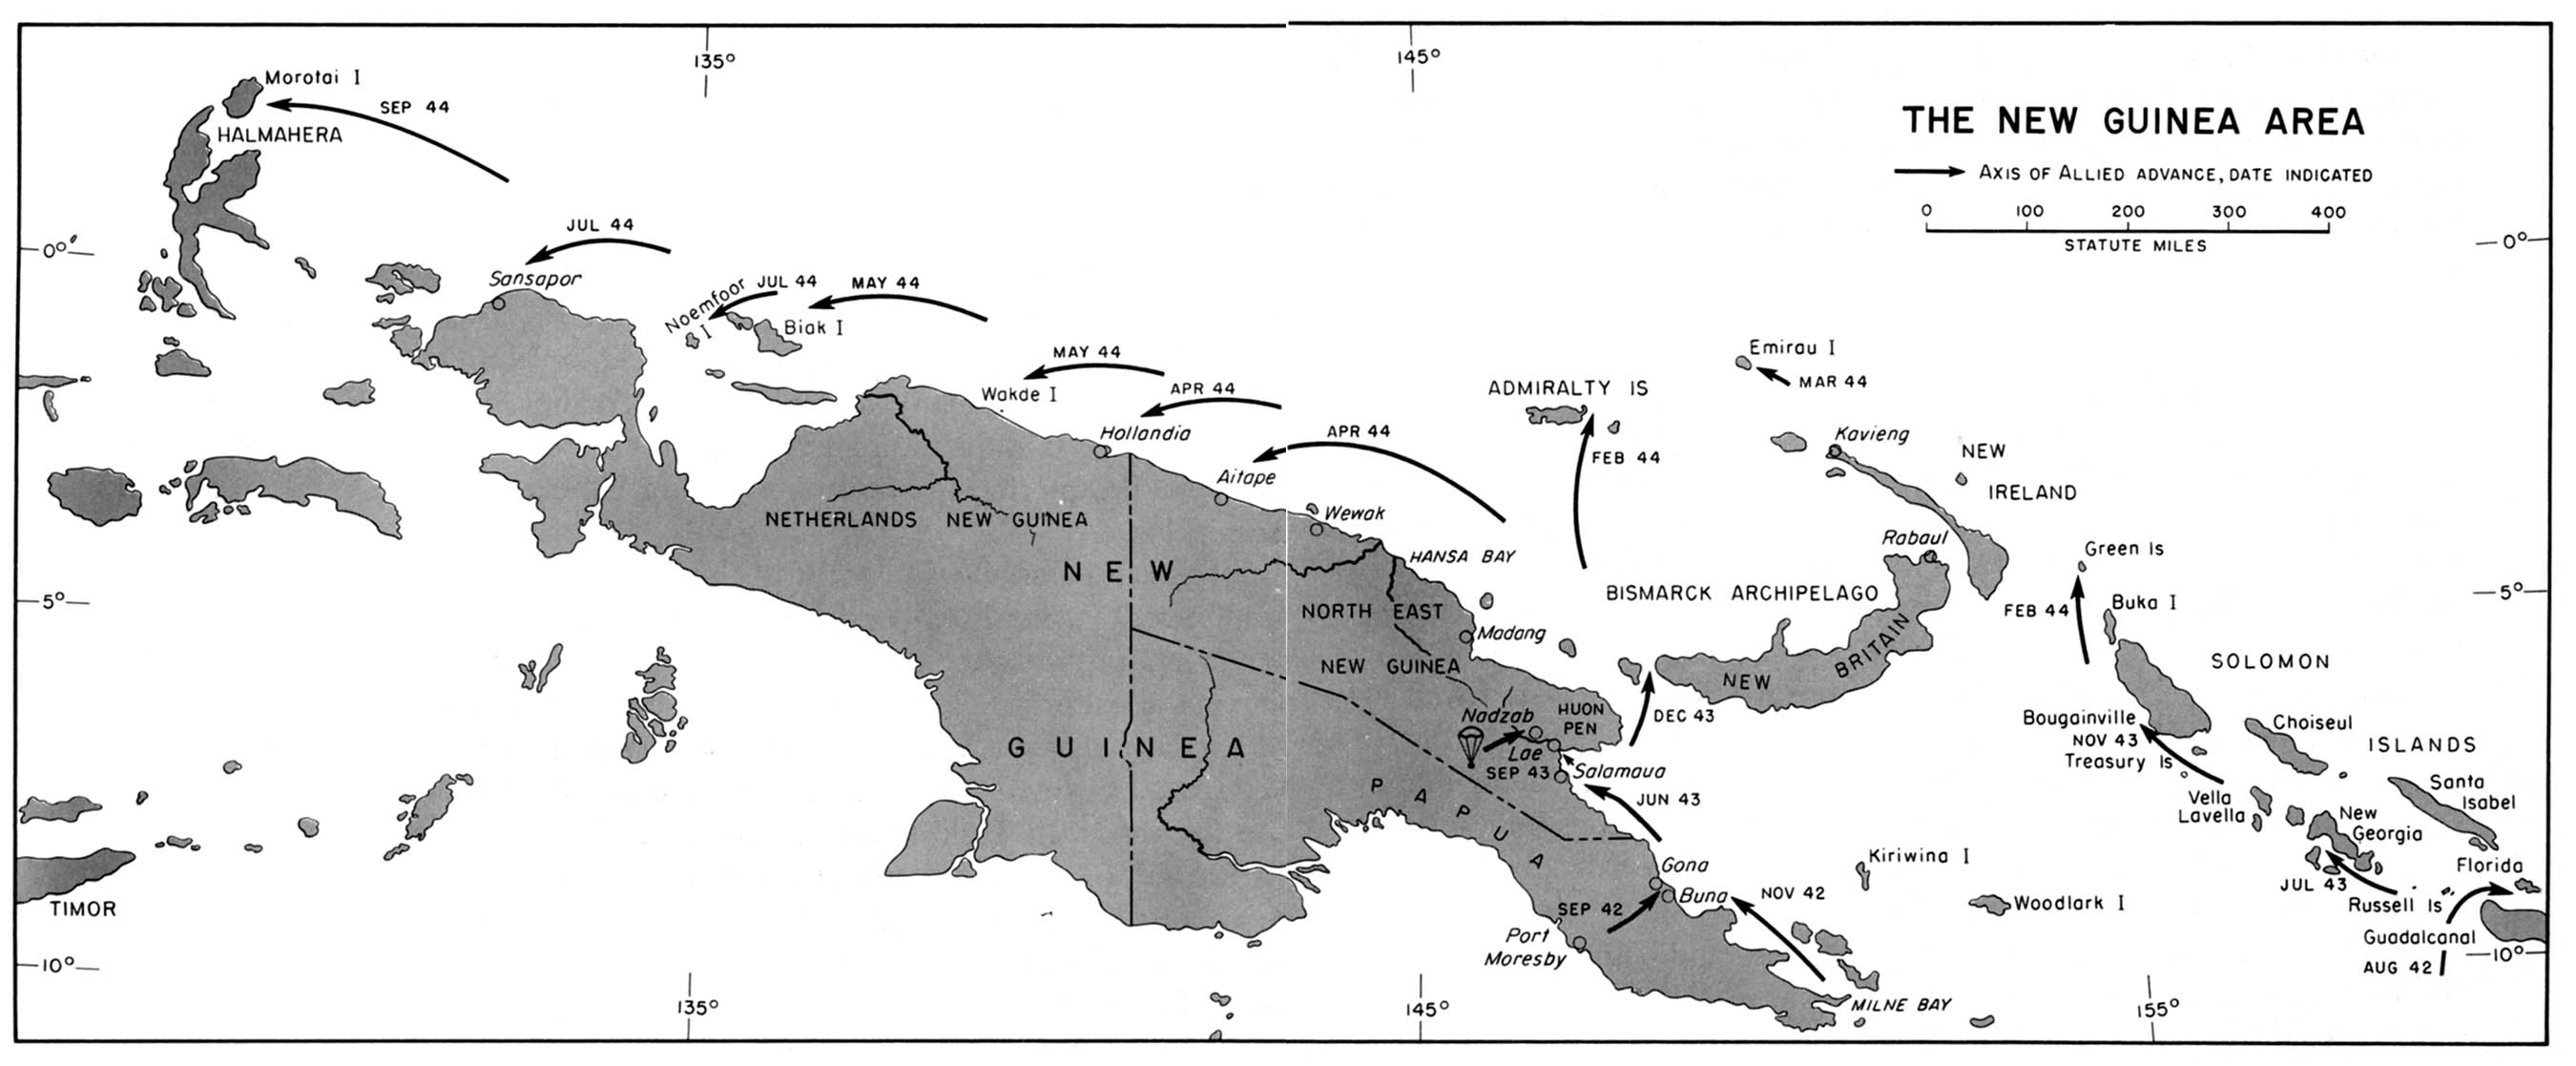
In January of 1942 Japan seized the city of Rabaul on the island of New Britain from the Australians, Kavieng on New Ireland and Gasmata on the south coast of New Britain. These three cities were to be used as bases for the invasion of New Guinea. Forces from Gasmata began the assault on New Guinea in February. They captured the cities of Salamaua, Lae and Finschhafen. Preparations were being made for an attack on Port Moresby in southern Papua when the Japanese received word that American forces had bombed Tokyo.
Map of New Guinea
|
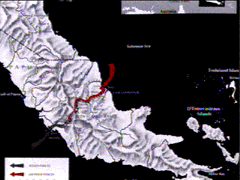
As a result of the setbacks in the Coral Sea and Midway Island, the Japanese postponed the invasion of Port Moresby. A decision was made to try to take Port Moresby by an overland advance from the north coast of New Guinea. On July 21 troops from the Japanese 17th Army began to land at Buna, on the north coast of New Guinea. They were to cross the Stanley Owen Mountains in order to get to Port Moresby. The Japanese reached and occupied Kokoda on July 29 and through the control of the Bismarck Sea were able to raise their strength to about 13,500 men. The troops did little to help against repeated Allied bomber attacks that broke down the Japanese line of communications. General Douglas MacArthur, who in command of all land and army forces in the Philippines, New Guinea, the Bismarck Archipelago, the Solomons, Australia and most of Indonesia, ordered the 18th Australian Brigade to Milne Bay and the 21st Australian Brigade to Port Moresby. General Sir John Blamey of Australia took control of the operations in New Guinea on September 23. He began to drive the Japanese back along the Kokoda trail. After entering the city of Kokoda, the Australians forced the Japanese to retreat from Templeton's Crossing to the west bank of the Kumusi river and then to the east bank with help from air support. After crossing the Kumusi River, the Australians built airfields near Gona and Sonananda which made it possible for artillery and supplies to be flown to the forward area.
Kokoda Trail Map
photo from ww2database
Meanwhile the 128th U.S. Infantry Regiment, along with an Australian battalion, moved towards Pongani. In November the 126th and 127th Infantry Regiments, along with the 6th Australian Division joined the march. Lt. Gen. R.L. Eichelberger took charge of the American troops with orders from MacArthur to, "take Buna or not come back alive". Gona was captured by the 21st Australian Brigade on December 9 but progress on the other targets moved slowly. Weather, disease and battle casaulties slowed the Allies movements. Sanananda and Buna were finally taken by January 21. The Australians had lost close to 5,700 men and the Americans about 2,800 since July. Japanese losses are not precisely known, but it is believed to have been around 12,000 men.
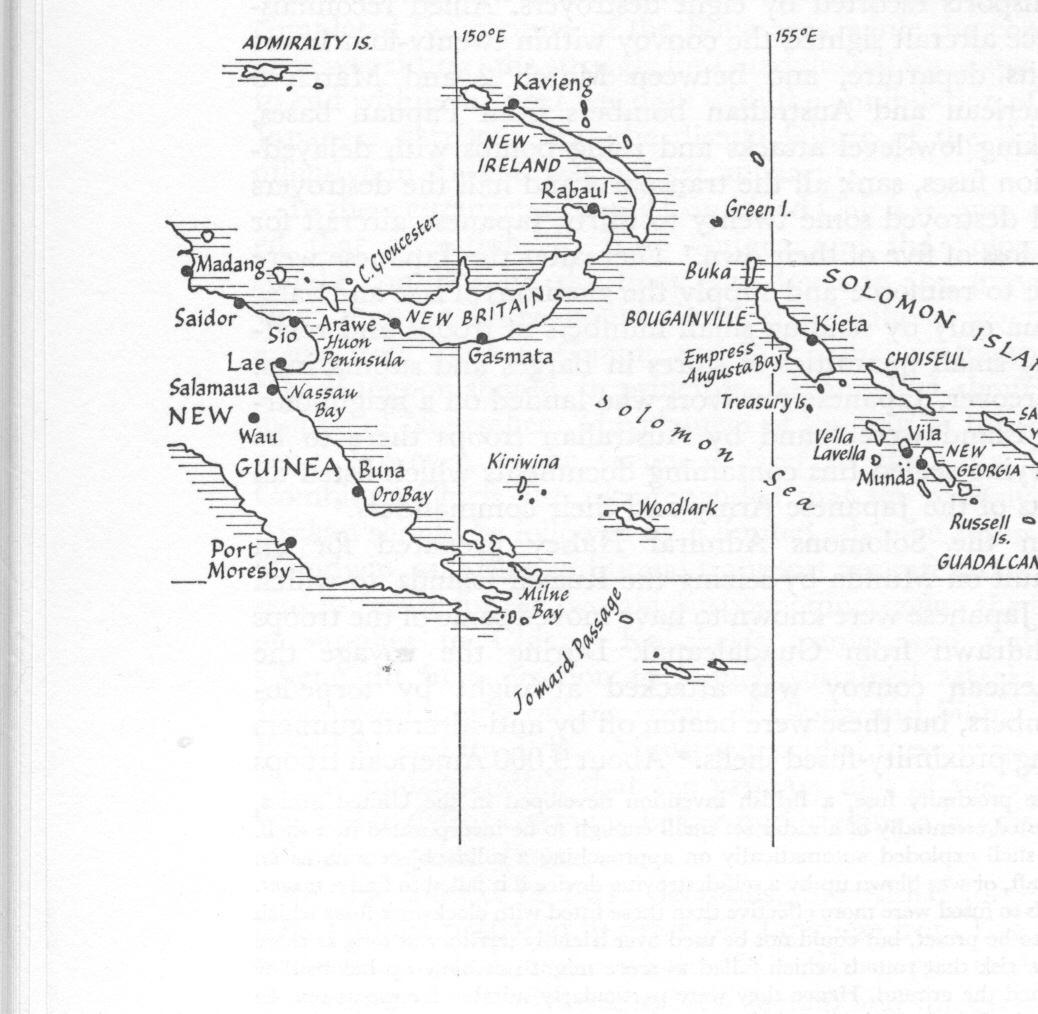
Next, the Allied forces prepared to drive the Japanese from Lae and Salamaua. These cities are located on the Huon peninsula which was to be used as a starting point for the capture of Rabaul. The Australians were able to push the Japanese north, towards the coast. The Japanese decided to reinforce the garrison of Lae with the 51st Division, which was in Rabaul. The reinforcements were to be brought over by eight transports escorted by eight destroyers. Allied reconnaissance aircraft spotted the convoy and between March 2 and 5 American and Australian bombers sank all the transports and half the destroyers.
image from Collier, B.
|
Meanwhile the 128th U.S. Infantry Regiment, along with an Australian battalion, moved towards Pongani. In November the 126th and 127th Infantry Regiments, along with the 6th Australian Division joined the march. Lt. Gen. R.L. Eichelberger took charge of the American troops with orders from MacArthur to, "take Buna or not come back alive". Gona was captured by the 21st Australian Brigade on December 9 but progress on the other targets moved slowly. Weather, disease and battle casaulties slowed the Allies movements. Sanananda and Buna were finally taken by January 21. The Australians had lost close to 5,700 men and the Americans about 2,800 since July. Japanese losses are not precisely known, but it is believed to have been around 12,000 men.
Next, the Allied forces prepared to drive the Japanese from Lae and Salamaua. These cities are located on the Huon peninsula which was to be used as a starting point for the capture of Rabaul. The Australians were able to push the Japanese north, towards the coast. The Japanese decided to reinforce the garrison of Lae with the 51st Division, which was in Rabaul. The reinforcements were to be brought over by eight transports escorted by eight destroyers. Allied reconnaissance aircraft spotted the convoy and between March 2 and 5 American and Australian bombers sank all the transports and half the destroyers.
Eastern New Guinea
|
For MacArthur's advance into Dutch New Guinea (western New Guinea), he would rely mostly on General Krueger's Sixth Army. Hollandia was chosen as the first target. Located next to Humboldt Bay, Hollandia would be used as a base for Allied naval, air and land forces. With nearly 50,000 troops at MacArthur's disposal, Hollandia and most of the surrounding areas were taken with relative ease. The capture of Hollandia was key to the Allies because the Japanese had 3 airfields about 10 miles west of the city and were in the process of building a fourth. Late in July of 1944 the city of Sansapor was taken without opposition, which was the last of MacArthur's objectives in New Guinea. MacArthur's advance along the north coast of New Guinea ended with the capture of every important base except for one at Wewak.
western New Guinea

|